Monday, April 23, 2012

68
Washi-Tape Clipboard Makeover


Washi-Tape has become my newest favorite craft supply. What is Washi-Tape? Washi-Tape comes from Japan. It is a paper tape that comes in a variety of colors, patterns and widths.
It is easily torn by hand and the feature I love the most is that it is removable.

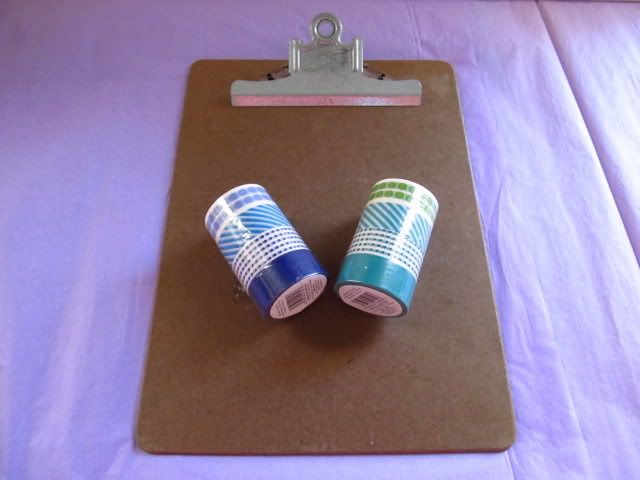
It took me three visits to three different Target Stores to find these rolls. The price for a 4 roll package is $4.00. I was able to find three color schemes; blue/purple, pink/red and green/turquoise.

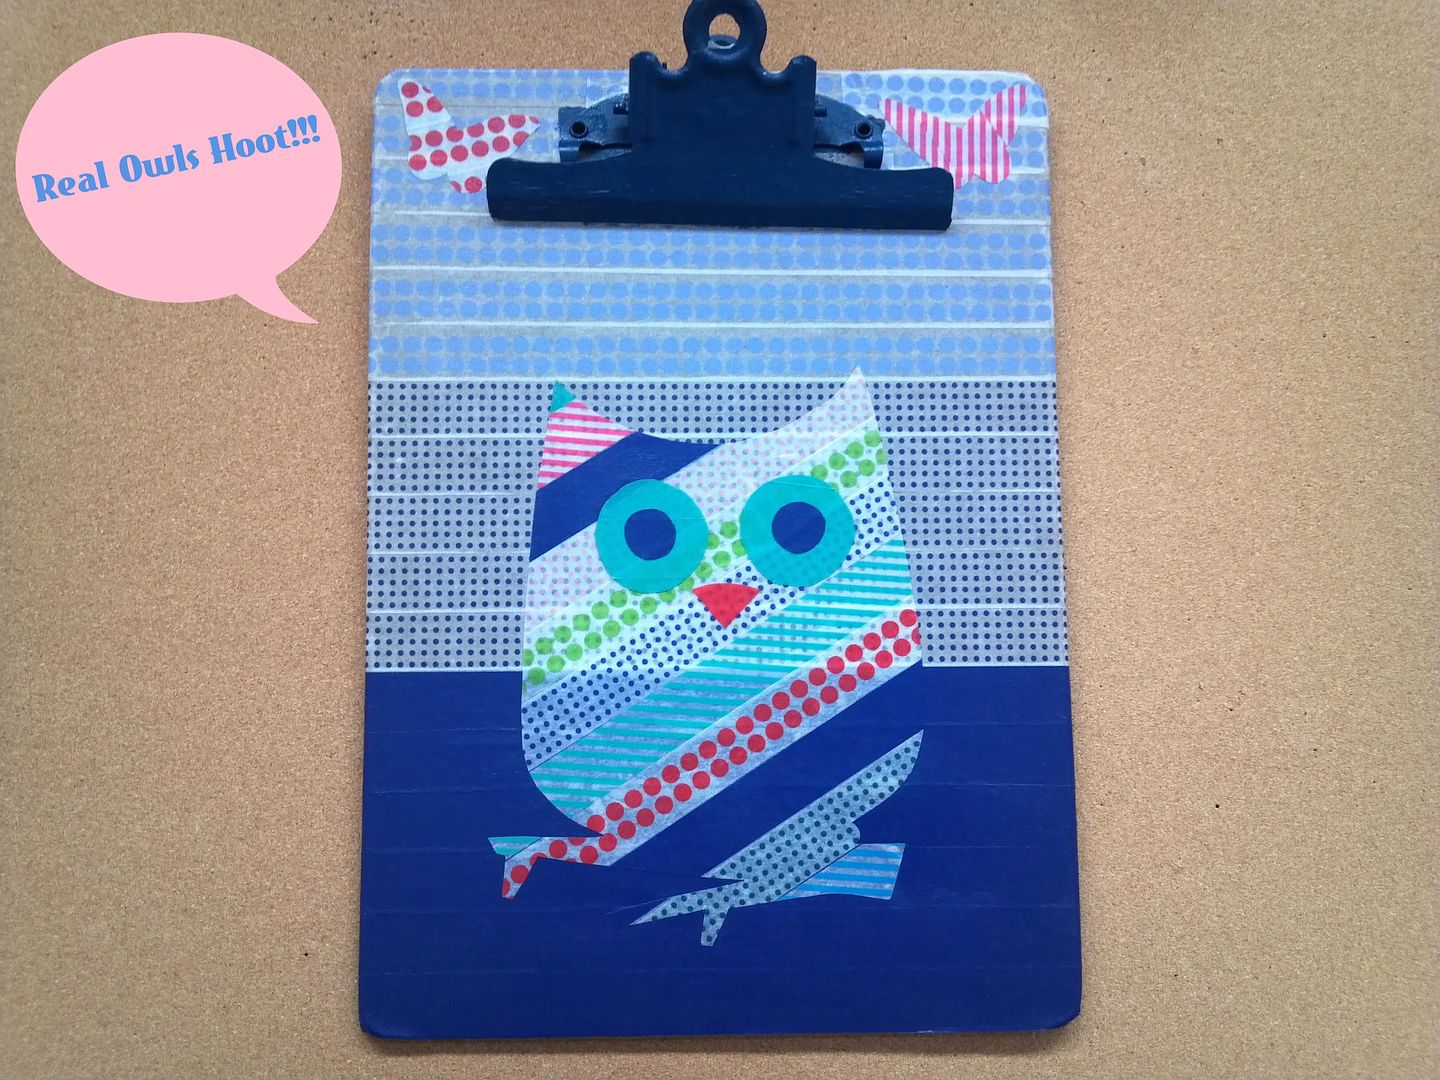
I decided to put my newly acquired crafty washi-tape to good use. My office's clipboard clearly needed a little brightening and Washi-Tape was the perfect media to bring my old clipboard to life.
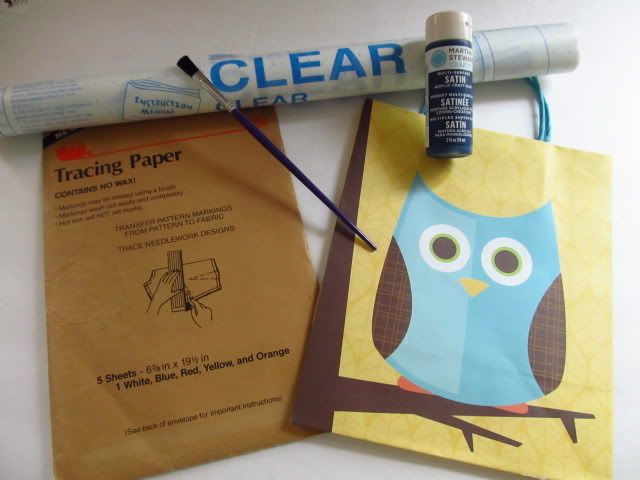
My clipboard design's inspiration came from a cute gift bag I stumbled upon at Target. The Owl print on this bag was all I needed to start my creative thought process. Let's begin....

Materials:
  1. Washi-Tape
  2. Clipboard
  3. Templates, Graphics
  4. Paint for Clipboard Clamp. I found a Martha Stewart Multi-Surface Satin Acrylic Paint in "Wild Blueberry" at Michaels.
  5. Small Paint Brush
  6. Clear Contact Paper
  7. Tracing Paper. I used Dritz Tracing Paper. A Red sheet works best to see image through.
  8. Mod Podge and Foam Brush
  9. Scissors
Instructions:
  • Paint Clipboard Clamp. Give it 2 coats. Let Dry.
  • Start adding Washi-Tape across the Clipboard in any direction you choose. I decided to used the same color scheme adding strips of solid and patterned pieces of tape.
  • I photocopied the bag's image to make it easier to transfer it onto the contact paper.
  • Cut a piece of Clear Contact paper to fit your template or graphic.
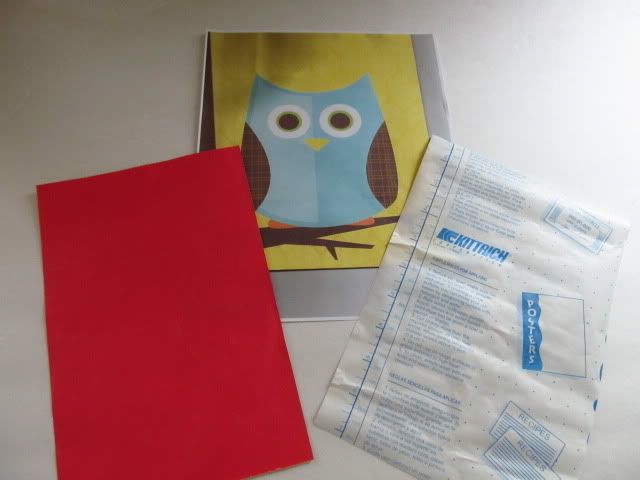
  • Arrange tracing layers together. With the back side of the contact paper facing up, lay Tracing Paper on top. Finally lay the template or graphic as the final layer. Begin tracing your image.
  • Turn traced contact paper over and tape it over a blank sheet of paper. This method will allow you to see the traced image through while applying the Washi-Tape.
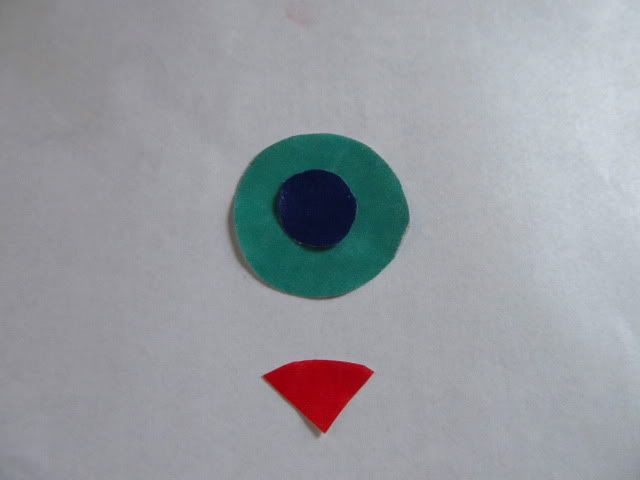
  • Start applying the Washi-Tape in any direction covering the entire image.
  • Cut images following the traced outlines.
  • Remove backing from Contact Paper images and apply onto clipboard. For additional embellishments, I made two butterflies following the same method used on the main image. Go HERE to find the cute Butterfly clip art I added to my design.
  • My clipboard design has two layers of Washi-Tape. Therefore, I brushed a thin layer of Mod Podge over entire clipboard to protect the design.
I think my Clipboard looks happy in the company of this colorful "OWL".


I can't wait to find other crafty ways to use this amazing Tape. Keep tune...Have a Hoot of a Day!!


Linking to:

Visit thecsiproject.com

Tuesday, April 17, 2012

13
Spring Birdseed Ornaments


Spring is finally here. The birds are singing and the warm weather is uplifting our spirits. What better gift for our beautiful singing birds than Homemade Birdseed Ornaments!!! Hang these ornaments in your yard and watch these feathery friends gather and perhaps they will surprise you with a tune or two in appreciation for the goodies you made for them.

Materials:
  1. Birdseed Mix
  2. Peanut Butter
  3. Wooden Spring Cutouts or other Templates
  4. Jute Twine
  5. Cardboard Box
  6. Black Flair
  7. Scissors
  8. Awl or hole punch


Instructions:
  • Cut out a cardboard piece to fit your shapes.
  • Trace your shape onto the cardboard using the wooden cut outs or templates.
  • Trace 2 circles on top of each shape to hang the ornaments.
  • With Awl punch holes. Cut a piece of Jute Twine, about 14". Thread each end of twine through openings to make the hanger.
  • Knot each Twine end toward the back of the ornament.
  • Spread Peanut Butter all over the front and back of the ornaments.
  • Sprinkle birdseed over the ornaments.
  • . This part is a bit sticky and messy...
  • Set your Ornaments in a dry spot to dry...
Your Spring Birdseed Ornaments are ready for your Feathery Friends to enjoy.


Happy Spring!!!!

Thursday, April 5, 2012

10
The Social Knitwork Scarf

Happy Spring to all you!!!! I am extremely excited to participate in the Conceptual Knitting Series, #2,
"The Social Knitwork Scarf", hosted by Leafcutter Designs. The Social Knitwork Scarf is a fun way to bring together my Love for Knitting and my Social Networks. The fun begins when my Friends, Family and Acquaintances help me design a Scarf which will be knitted in stripes of four colors; designated to the most popular social media: Facebook; Twitter; Pinterest/Gmail and Blogger. The Colors they will be choosing from are: Cherry, Silver Blue, Pumpkin and Colonial Blue.
I will knit rows as the comments arrive with the colors they have chosen, until the Scarf reaches the length I desired.

Materials:
  • Worsted Weight Yarn in four colors
  • Knitting Needles - Size 8
Instructions:
  1. Cast on 32 stitches in the color each person chose and knit every row in Garter Stitch.
  2. Continue knitting rows in Garter Stitch in the color choices as they arrive for desired length.


Please pick a color and tell me why??
Leave me a comment with your color choice. Thank you for participating in this Fun Social Network project.


My Social KnitWork Scarf will in some way be part of all of you and I will cherish it forever. Happy Easter!!!
Pin It button on image hover