


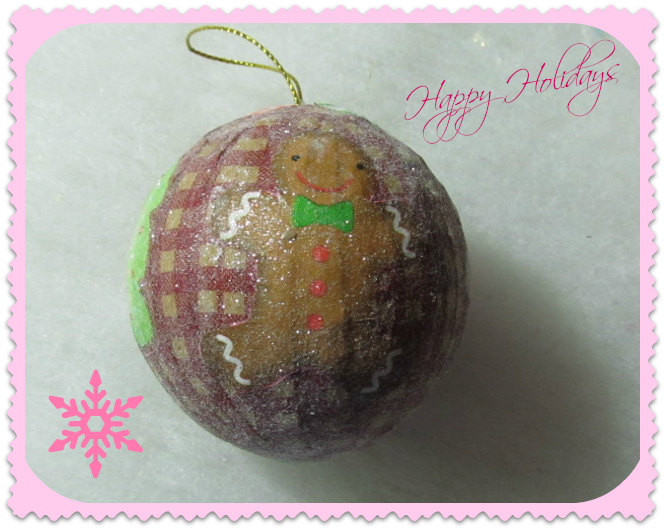
HAPPY HOLIDAYS!! Christmas Ornaments make great gifts. Paper Mache Ornaments are easy and fun to make. You can use any type of paper to Decoupage Paper Mache. I used a cute wrapping Christmas paper I stumbled upon while shopping at Target and Kraft Paper from the Dollar Store.
This Holiday, I decided to participate in One Artsy Mama's first Ornament Exchange.

I was paired up with Melanie from BearRabbitBear. Decoupage is one of my favorite craft. I decided to create a Paper Mache Ornament for Melanie.
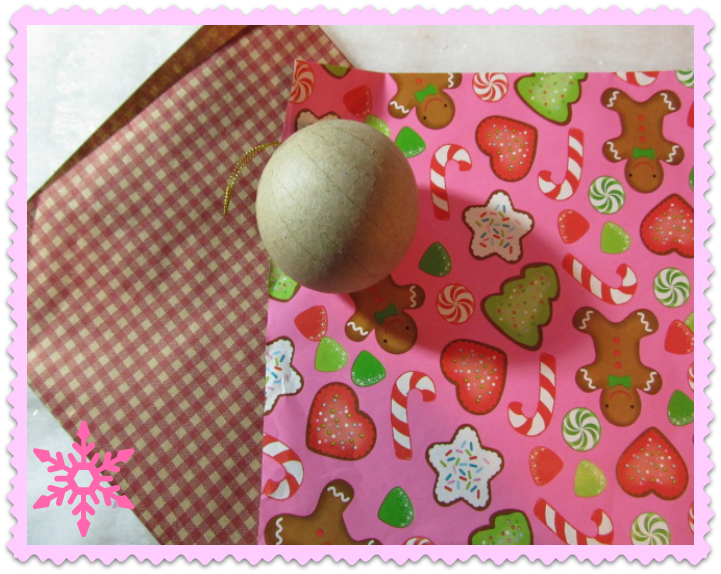
To begin, I gathered the following materials:
- 4" Paper Mache Round Ornament
- Wrapping Paper
- Kraft Paper
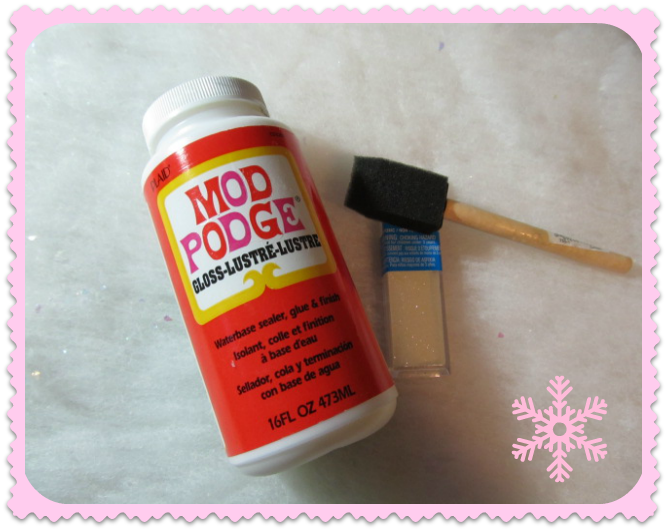
- Mod Podge
- Foam Brush
- Fine Glitter
- Toothpick
- Hot Glue & Sticks
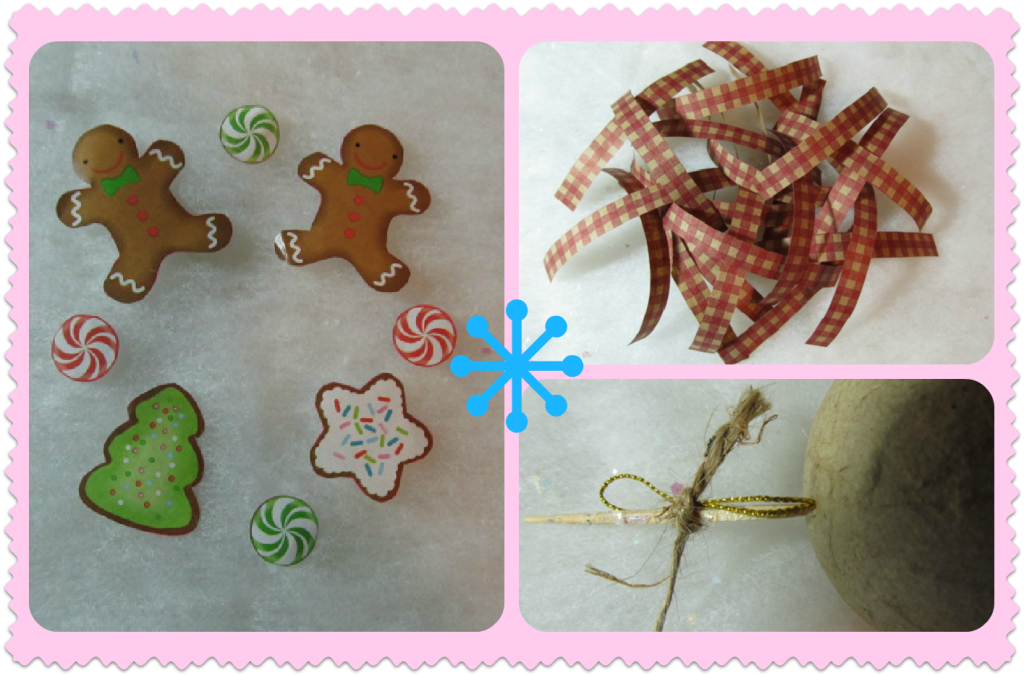
- Cut out your designs from the wrapping paper. I cut two gingerbread men, one tree and one cookie, plus a few peppermint candies.
- Cut 20-25 1/2" x 4" strips of Kraft paper.
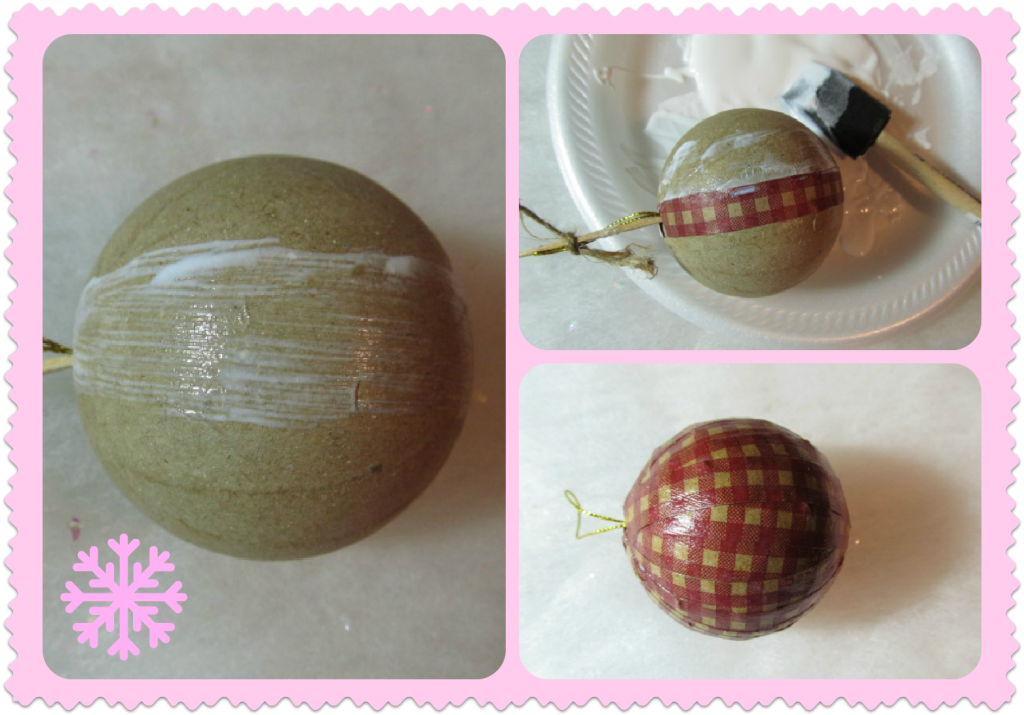
- Insert a toothpick inside the ornament's top section and tie the hanger to it to prevent gluing it to the surface. Having the toothpick inside the ornament will help you hold the ornament as you add your strips.
- Working in sections, begin adding the paper strips to the ornament. Apply a thin layer of Mod Podge to the ornament's surface and to the back of each paper strip. Apply strip to the ornament, smoothing with brush or your fingers.
- Continue adding and overlapping the paper strips until ornament is covered. Add another coat of Mod Podge over entire ornament. Let dry completely.
- Apply Mod Podge to your design cut-outs and apply them around the ornament. I applied my cut-outs using this sequence: gingerbread men, tree, gingerbread men and a cookie. I added the peppermint candies to the ornament's top section and one to the bottom.
- Apply another thin coat of Mod Podge over the entire ornament to seal the design. Let dry completely.
- Add a final Mod Podge coat and sprinkle glitter while the surface is wet. Let dry completely
- Remove the toothpick. If the hanger detaches from the ornament, use some hot glue to re-attach.
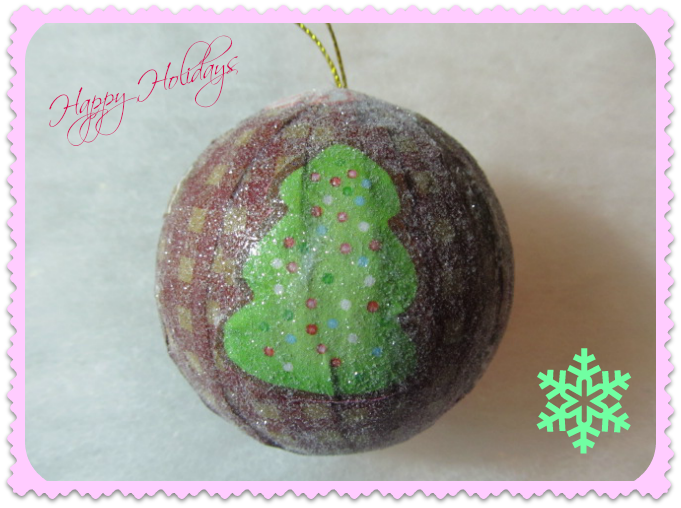
Here is another view of the Ornament. I love how this ornament turned out.
I hope Melanie likes it.
I hope Melanie likes it.

Merry Christmas!!!!

debbie-debbiedoos


these are adorable! i love the touch of sparkle!
ReplyDeleteHi there!!!! I LOVE this project. so cute!!! Your blog is great too. I'm hanna and I am your newest follower:) Nice meeting you:) Yo can find me any old time at www.bouffeebambini.blogspot.com
ReplyDeleteHAPPY HOLIDAYS!!!! xoxoxoxo Hanna
Very cute! This will be fun to do with the grandkids, yours turned out adorable!
ReplyDeleteSaw you linking at the Dollar Store Link Party
Debbie :)
So cute! Thanks for participating!
ReplyDeletethe addition of the glitter is the perfect finishing touch! thank you so much for linking up to our party!
ReplyDeleteI love it! Thanks also for showing the details because I am new to such craftiness!
ReplyDeleteWhat a great idea! These are so much fun!
ReplyDeleteizmir
ReplyDeleteErzurum
Diyarbakır
Tekirdağ
Ankara
8CU
Mardin
ReplyDeleteistanbul
Çanakkale
Antep
Elazığ
CTB6
tekirdağ
ReplyDeletetokat
elazığ
adıyaman
çankırı
CSUEFJ
adıyaman
ReplyDeletesakarya
yalova
tekirdağ
amasya
0XN
görüntülüshow
ReplyDeleteücretli show
GSYMGF
giresun evden eve nakliyat
ReplyDeletebalıkesir evden eve nakliyat
maraş evden eve nakliyat
kastamonu evden eve nakliyat
kocaeli evden eve nakliyat
MDUQSC
Maraş Lojistik
ReplyDeleteHatay Lojistik
Tokat Lojistik
Elazığ Lojistik
Aksaray Lojistik
PKNK
53E4F
ReplyDeleteÇerkezköy Parke Ustası
Bitcoin Nasıl Alınır
Çanakkale Evden Eve Nakliyat
Sivas Evden Eve Nakliyat
Ardahan Evden Eve Nakliyat
7A471
ReplyDeleteKarabük Şehirler Arası Nakliyat
Ankara Fayans Ustası
Pancakeswap Güvenilir mi
Afyon Lojistik
Yenimahalle Parke Ustası
Yobit Güvenilir mi
Çorum Lojistik
Ünye Marangoz
Çerkezköy Organizasyon
23770
ReplyDeleteAmasya Şehir İçi Nakliyat
Artvin Lojistik
Diyarbakır Parça Eşya Taşıma
Hatay Şehir İçi Nakliyat
Trabzon Parça Eşya Taşıma
Ordu Şehir İçi Nakliyat
Mersin Evden Eve Nakliyat
Ünye Çelik Kapı
Balıkesir Evden Eve Nakliyat
3F7DF
ReplyDeleteAksaray Evden Eve Nakliyat
Çorlu Lojistik
Iğdır Evden Eve Nakliyat
Çanakkale Lojistik
Kırşehir Şehir İçi Nakliyat
Rize Şehirler Arası Nakliyat
Loop Network Coin Hangi Borsada
Bybit Güvenilir mi
Çorum Evden Eve Nakliyat
67BFE
ReplyDeleteBinance Kimin
Instagram Beğeni Satın Al
Bitcoin Madenciliği Siteleri
Bitcoin Nasıl Üretilir
Dxgm Coin Hangi Borsada
Binance Sahibi Kim
Mexc Borsası Güvenilir mi
Bitcoin Para Kazanma
Madencilik Nedir
27B4E
ReplyDeleteyearn
phantom
shiba
galagames
dextools
defillama
poocoin
ledger live
pancakeswap